Introduction
If you’ve ever walked into a science lab, you’ve probably seen an Erlenmeyer flask sitting somewhere between a beaker and a pile of tubes. It looks simple enough, but here’s the thing, this little piece of glassware plays a huge role in everyday lab work. You’ll see it in chemistry labs, biology labs and even high school classrooms because it makes handling liquids safer and easier.
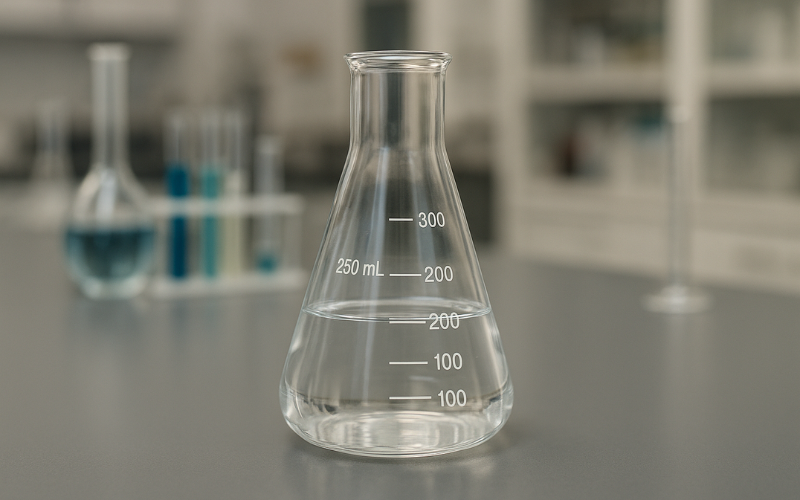
At its core, an Erlenmeyer flask is a conical shaped container with a flat base and a narrow neck. That specific shape isn’t just to make it look scientific. It’s designed so you can mix liquids without worrying about them splashing out. When you swirl a beaker full of solution, you’ll know very quickly how messy that can get. With this flask, you can swirl comfortably and confidently.
From a professional point of view, it’s one of the most practical laboratory tools you can own. You’ll use it for mixing, heating, storing and even measuring liquids, although it isn’t as precise as something like a volumetric flask or graduated cylinder. Still, for routine experiments, the Erlenmeyer flask is a reliable workhorse that simply makes your life easier.
Snippet
An erlenmeyer flask is a conical shaped lab container used for mixing, heating and storing liquids. Its narrow neck prevents spills and makes swirling easy, which is why it’s popular in chemistry and biology experiments.
What makes the Erlenmeyer flask unique
The design of an Erlenmeyer flask is what sets it apart. That conical body gives it a low center of gravity, so it doesn’t tip over easily, which is a blessing when you’re working with corrosive or expensive chemicals. The narrow neck helps reduce evaporation, improves heat retention and makes it easy to plug or cap if needed.
Another subtle benefit is how easy it is to clamp. When you’re heating a solution or running an experiment where glassware must stay stationary, a wide beaker can wobble or slip. The flask’s narrow neck fits perfectly into most lab clamps, which keeps everything stable.
Now let’s talk about the graduations. You’ll notice markings on many Erlenmeyer flasks, but they’re built for approximate measurements. If you need accurate measurements for analytical experiments, you’re better off using a volumetric flask or graduated cylinder. The Erlenmeyer flask is great for mixing and observing reactions, not for delivering precise volumes.
Quick Comparison Table (Simple, Useful, Scan-Friendly)
| Feature | Erlenmeyer Flask | Beaker | Volumetric Flask |
| Accuracy | Low | Low | High |
| Best Use | Mixing, heating, reactions | Holding, stirring | Precise measurement |
| Shape | Conical | Cylindrical | Pear-shaped |
| Heating | Good | Good | Poor |
| Spill Risk | Very low | Medium | High |
Main uses of the Erlenmeyer flask in labs
The most obvious use is mixing solutions. The conical shape lets you swirl chemicals smoothly without worrying about spills, which means you don’t waste material and you don’t accidentally ruin your desk or yourself. This matters when you’re working with acids, volatile chemicals or anything that stains.
The flask also handles heating pretty well. Unlike beakers, which can splash easily when boiled, an Erlenmeyer flask controls boiling more safely because of its tapered opening. I’ve personally boiled solutions hundreds of times in Erlenmeyers on both hot plates and open flame. The trick is to heat gradually to avoid sudden bubbling, which can shock the glass.
One underrated use is storing and transporting liquids for short durations. Many of us in labs temporarily store cultures, buffers or reaction mixtures in these flasks while moving between workstations. If you need long term storage though, a sealed bottle or container is safer.
Where the Erlenmeyer flask is used chemistry biology and education
In chemistry, the Erlenmeyer flask is often used in titrations, precipitation reactions and mixing reagents. Its shape is ideal for reactions where gases can escape without causing pressure buildup. During titrations, you can swirl continuously as you add titrant without splashing, which reduces error and keeps your table clean.
In biology labs, you’ll see specialized versions of this flask used to grow cell cultures or microbial cultures. These include baffled flasks, screw capped flasks and sterile plastic versions. The baffled design increases aeration when shaking, which helps microorganisms grow faster. If you’ve ever used a shaker incubator, you know how important oxygen exchange is for culture health.
Educational labs love Erlenmeyer flasks because they’re safe and versatile. Students can boil water, dissolve solids and observe reactions without advanced equipment. On top of that, they’re durable and inexpensive, so breaking one doesn’t cause a lab budget crisis.
Erlenmeyer flask vs other lab glassware
Erlenmeyer flask vs beaker
A beaker is great when you just need an open container for stirring or holding liquids. An Erlenmeyer flask is better when you want to mix by swirling instead of stirring, because the narrow top prevents spills. You’ll also notice that you lose less liquid to evaporation.
Erlenmeyer flask vs volumetric flask
A volumetric flask is designed for precise measurement. If the goal is accuracy, use volumetric glassware. If the goal is mixing or heating, use an Erlenmeyer flask. In analytical labs, we often use volumetric flasks to prepare stock solutions and Erlenmeyers to perform experiments using those solutions.
Erlenmeyer flask vs graduated cylinder
Graduated cylinders are only for measurement. They’re tall, narrow and awkward to swirl. They’re designed to read meniscus levels accurately, not to heat or mix solutions.
Erlenmeyer flask vs conical flask
People often ask if these are different. They’re not. Erlenmeyer flask is the technical name. Conical flask is the common name used in many regions.
Erlenmeyer flask sizes materials and specialized variations
Most labs stock flasks ranging from 50 milliliters to 2000 milliliters. Smaller sizes are good for analytical experiments. Larger sizes work well for culture growth, heating or storage.
Material matters. Glass Erlenmeyer flasks can handle heat and chemicals better than plastic ones, but plastic is great when you need light weight equipment or disposable sterile containers. In microbiology labs, you’ll see plastic Erlenmeyers used for culture work because they come pre sterilized.
Then there are specialty versions like:
- Baffled flasks for aeration
- Screw cap flasks for transport
- Filtering flasks for vacuum filtration
These don’t get much attention in classrooms, but they’re life savers in professional labs.
How to choose the right Erlenmeyer flask for your experiment
Picking the right Erlenmeyer flask is mostly about matching its size and material to what you’re doing. A small 50 ml flask is great when you’re working with limited samples or running small reactions. If you’re preparing culture media or need high volume mixing, jump straight to 500 ml or 1 liter. Bigger isn’t always better though, because heating large volumes takes longer and inconsistent temperature can affect results.
You should also think about heat, chemicals and sterilization. Glass Erlenmeyer flasks survive higher temperatures and harsher solvents than plastic ones. I’ve melted more than one plastic flask while autoclaving or heating, so don’t repeat my mistake. If you’re working with acids, organic solvents or high heat, glass is the safest bet.
There are also times when the Erlenmeyer flask isn’t the best option. If your experiment depends on precise liquid measurement or reactions that produce gas pressure, pick more specialized glassware. Volumetric flasks, boiling flasks and sealed bottles all outperform Erlenmeyers in specific scenarios. The key is not choosing the flask you have, but the one that fits the job.
How to safely use an Erlenmeyer flask
Using an Erlenmeyer flask might look straightforward, but there are a few safety habits that make life easier. When you mix by swirling, do it in quick, circular motions, especially if you’re handling harsh chemicals. If you’re adding solids to liquids, tilt the flask slightly to prevent clumping and splashing.
Heating is where many newcomers get nervous. You can heat an Erlenmeyer flask over a hot plate or open flame, but heat slowly. Sudden temperature change can shock the glass and cause cracks. I’ve seen a flask explode because someone put cold liquid in a hot flask. That’s a scary experience you don’t want to recreate.
Storage is another area where people slip up. These flasks aren’t meant for long term storage because the narrow neck can trap vapors and pressure. Use them for short term work, then transfer liquids to bottles with proper caps.
Can you measure accurately with an Erlenmeyer flask
Many beginners assume that the markings on the flask are accurate. They’re not. The graduations are approximate, which is fine if you’re mixing a buffer or dissolving a powder. For analytical chemistry or quantitative work, use a volumetric flask or graduated cylinder.
If you really need to use an Erlenmeyer flask for measurement, follow these tips:
- Use the same flask consistently for repeat experiments
- Fill slightly below the marking then top up carefully
- Check for parallax error by viewing at eye level
The best part is, once you understand the limitations, you’ll know exactly when this flask is good enough and when it’s not.
Cleaning and maintaining Erlenmeyer flasks
Cleaning a flask depends on what was inside. If you just heated water or mixed simple solutions, rinse with warm water and mild detergent. Avoid cold water on hot glass because it can crack instantly. For biological work, use bleach or specialized disinfectants before rinsing, otherwise residue stays behind.
Stubborn residues are a different story. Some organic compounds cling to glass and need strong solvents to remove. I’ve used acetone, ethanol and even overnight soaking to clean up stubborn stains. Just don’t mix cleaning chemicals randomly because they can react and create toxic fumes.
Always inspect your flasks before use. Look for chips, cracks and scratches, especially around the neck. These weaken the glass and lead to sudden breakage during heating or mixing. Discard damaged flasks immediately, no matter how minor the defect looks.
Erlenmeyer flask price and buying tips
Prices for Erlenmeyer flasks vary depending on size, material and specialty design. Basic glass flasks are pretty affordable and you can buy them individually or in packs. Specialized ones like baffled or screw cap designs cost more because they’re used in research environments.
When you’re buying for routine use, there’s nothing wrong with going cheap. Students, hobbyists and general labs don’t need premium borosilicate glass unless they work with extreme heat or chemicals. On the other hand, if you’re doing microbiology work, invest in high quality flasks because contamination ruins weeks of effort.
One useful tip is buying online from lab suppliers. You’ll find sets with different sizes, which give you more flexibility than buying one large flask. Local suppliers are fine too, but prices tend to be higher and selection smaller.
The medical meaning of Erlenmeyer flask deformity
Here’s a curveball, the term Erlenmeyer flask deformity doesn’t refer to the glassware at all. It’s a medical term used to describe a bone shape that resembles the funnel like shape of the flask. On X rays, the ends of long bones widen and create a flared appearance.
You’ll see this deformity in conditions like Gaucher disease or certain metabolic disorders. Radiologists use it as a visual clue to identify underlying health problems. If you’re a student in biology or medicine, this might seem confusing at first, but the name makes perfect sense once you see the image.
How to draw an Erlenmeyer flask
Drawing an Erlenmeyer flask is easier than it looks and it helps a lot when you’re writing lab reports or creating diagrams. Start with a wide V shape for the body, make sure the sides curve slightly inward. Add a short neck at the top and a flat line underneath for the base.
If you want it to look more realistic, label the main parts like neck, body and base, and add a few graduation marks. Don’t go overboard on details. A clean, simple diagram works better than an artistic one.
How to pronounce Erlenmeyer flask and where the name comes from
If you’ve ever struggled with saying Erlenmeyer, you’re not alone. The common pronunciation is er len my er. You’ll hear slight variations depending on accents, but that version works almost everywhere.
The name comes from Emil Erlenmeyer, a German chemist from the 1800s who designed the flask to make mixing and heating easier. He wasn’t trying to become famous, he just wanted practical equipment for everyday lab work. His design stuck, and now it’s found in labs around the world.
You might also hear people call it a conical flask or titration flask. Don’t get confused, these are just common names people use in different regions.
The Erlenmeyer flask in pop culture
Believe it or not, this flask has made its way into pop culture. One of the most well known examples is an episode of The X Files called The Erlenmeyer Flask. The episode revolves around government secrecy, genetic experiments and scientific clues. The title wasn’t random, it was a symbol of hidden experiments.
Beyond that, the flask shows up everywhere, from crime shows to cartoons. Writers love using lab glassware as a visual shortcut for science, chemistry or mystery. Viewers immediately recognize the shape, even if they don’t know its name.
It’s a small reminder of how deeply science visuals are embedded in everyday storytelling.
Quick comparison table
A short comparison makes it easier to understand how the Erlenmeyer flask ranks against other glassware.
| Glassware | Best For | Accuracy | Heating | Shape |
| Erlenmeyer flask | Mixing and reactions | Approximate | Good | Conical |
| Beaker | Holding and stirring | Low | Good | Cylindrical |
| Volumetric flask | Precise measurement | High | Poor | Pear shaped |
| Graduated cylinder | Measurement only | Medium to high | Not recommended | Tall and narrow |
Conclusion
The Erlenmeyer flask might look simple, but it’s one of the most useful tools in any lab. Its conical shape lets you mix, heat and handle liquids safely, which saves time and reduces risk. You’ll find it in chemistry, biology and classrooms because it’s versatile and easy to use.
The best part is, once you understand how and when to use it, the flask becomes a reliable companion in everyday lab work. Whether you’re growing cultures, performing reactions or just heating a solution, this flask gives you flexibility that many other tools can’t match.
FAQs
Q1: What is an erlenmeyer flask used for?
It’s used for mixing, heating and holding liquids during lab experiments. Its tapered design prevents spills when swirling.
Q2: Why is the erlenmeyer flask shaped like a cone?
The conical shape reduces spill risk, improves heat control and makes swirling easier than with a beaker.
Q3: Can an erlenmeyer flask be heated?
Yes, it can be heated on a hot plate or flame, but do it gradually to avoid cracking.
Q4: Is an erlenmeyer flask accurate for measuring volume?
Not really. The markings give approximate readings. Use a volumetric flask or graduated cylinder for accuracy.
Q5: What sizes do erlenmeyer flasks come in?
Common sizes range from 50 ml to 2000 ml. Larger ones are used for culture growth and high-volume mixing.
Disclaimer
This guide is for educational purposes only. Always follow your lab’s safety rules, equipment manuals and professional training when working with chemicals or heat. We are not responsible for misuse or accidents.